
Handmade Wooden Block Candlesticks
When I’m creating, inspiration can come from all sorts of places! Sometimes it’s a new material that sparks a project idea, other times it’s an experience, place, or thing I’ve seen out in the world. For this project, it was both! I was looking back over old travel photos (something torturous I tend to do during lockdowns), and came across some shots of a trip to Ugo Rondinone’s Seven Magic Mountains installation in Vegas. The colours and forms juxtaposed against the blue sky and desert has always stuck with me as something incredibly inspiring and beautiful. I can’t get enough of looking at them!


On the same week I was reminiscing about Seven Magic Mountains I was browsing Facebook Marketplace (the best place for upcycled project materials) when I came across a collection of wooden Montessori blocks and an idea was formed! I’ve been really into home decor craft projects lately and immediately thought the blocks would be perfect to recreate my own mini Seven Magic Mountains sculptures at home - in candlestick form. Here’s a walkthrough of my making process, with notes on materials and techniques in case you want to try this yourself.

These Montessori blocks totally reminded me of the Seven Magic Mountains boulders
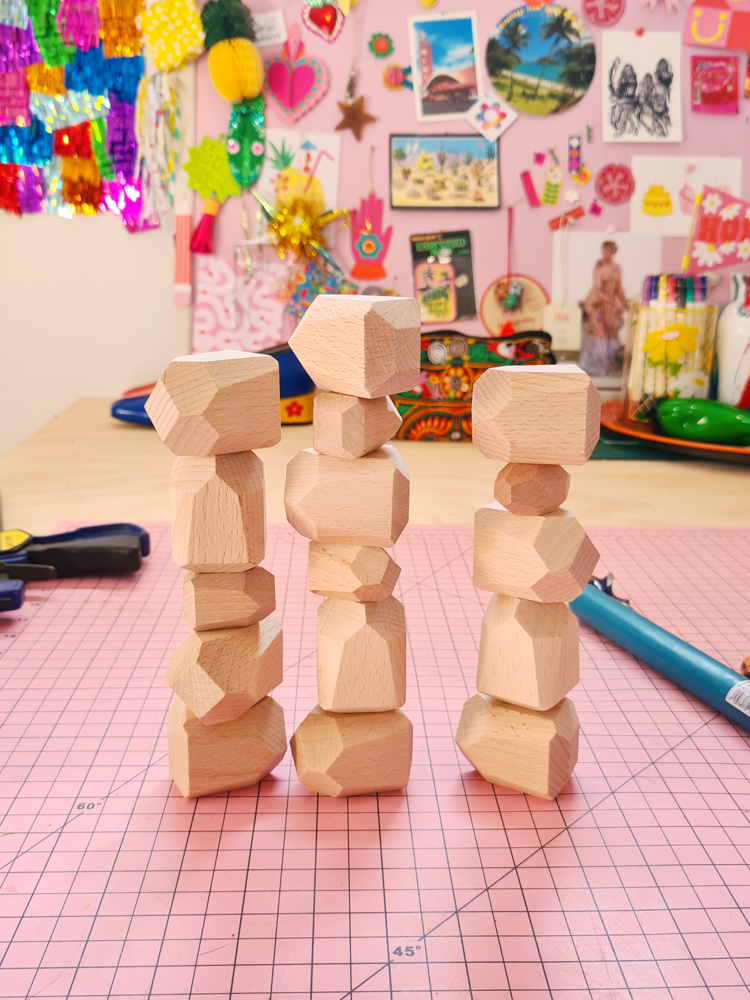
Testing stacking formations
I had a pretty good idea of how the blocks were going to stack together to form the candlesticks (secured block-by-block using a strong wood glue) but the main thing I had to work out was how my candles were going to sit securely into the tops. I wanted something heatproof and secure (because no one likes a candle that topples over while it’s lit), and eventually settled on the idea of using copper end caps from the plumbing section of my local hardware store.
Fortuitously for me, I found some that were pretty much the same diameter as my candlesticks! If you are looking for some yourself and can’t find any that fit, you can always shave down the base of your candle and taper it to fit. To create the hole I used a Tri-flute drill bit the same size as my copper end cap - totally loving all these lucky size matches for this project! Using small clamps really helped keep the little blocks steady so I could safely drill my holes. Finally, I used my Dremel to sand everything down.


Drilling a pilot hole to prep the block
I drilled a hole into the top blocks to perfectly fit my copper end cap
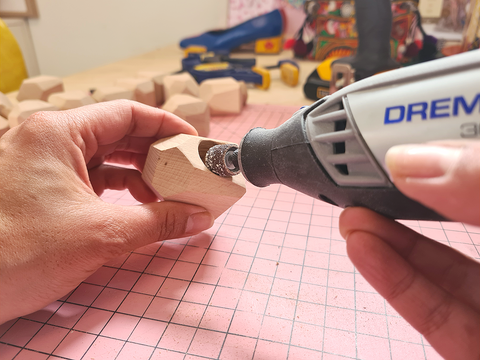

Sanding the edges with my ultimate favourite tool - my Dremel!
I used a tri-flute drill bit to create a hole the same size as my copper end cap
The next step was to glue the blocks together onto a flat base which would provide sturdiness for the candlestick. I used some round, blank coasters that I found in my local craft store. I used Gorilla glue for my adhesive because it works with metal and wood and can withstand high temperatures which I thought might come in handy in case the copper piece got hot from the candle. This part was a little fiddly because the blocks were precariously balanced and slid around a bit, but applying pressure to each join until the glue started to dry a little helped keep things stacked securely.

Gluing my candlestick structure together. I left the copper end cap unglued until after the painting was done.


The first of 4 colour combo attempts!
Testing colour combos for my candlesticks
After my candlesticks had dried I gave them another sand with my Dremel to clean up any stray glue and rough edges. Then it was time to paint! I had so much trouble with this stage, only because I couldn’t decide which colour combo to paint them in! I love colour so much and there are so many amazing ones out there - it was so hard to choose. I ended up painting and repainting 4 times before I settled on my finished palette!! I used acrylic hobby paint that I already had at home for this project, and some white house paint for the base coat. After I finally finished painting, I glued in the copper end cap, and my project was done! I am literally SO THRILLED with how they turned out!


The colour combo that dreams are made of!
A lil’ safety note: So obviously these candlesticks are made from wood, and painted with a plastic-based paint. I know this isn’t the safest of combinations, especially where flames are concerned. The candlesticks are mostly decorative, but if I did want to light the candles themselves, I’d be supervising them the entire time just to be safe!