
DIY Lampshade Planter Basket
Let's stop for a minute and spare a thought for the forgotten lampshades of this world. Dressed in faded floral frills, they sit alone, destined to spend the rest of their days gathering dust in the corner of a thrift shop. Well not anymore! Here’s a clever way to give those lonely lampshades a colourful makeover using yarn. It’s so fun and easy - and you can experiment with different combinations and colours in your weave. Here’s how.
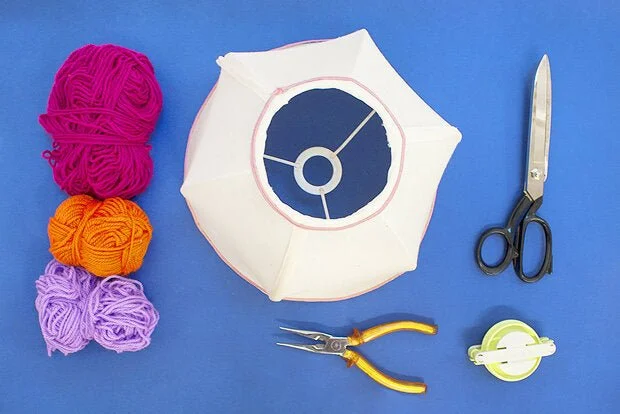
You Will Need
An old wire lampshade (look for a full frame rather than 2 rings joined by lampshade fabric. You’ll need the frame to weave onto)
Assorted coloured yarn or cord
Fabric scissors
Pom pom maker (or traditional cardboard pom templates)
Pliers/wire clippers

Step 1
Remove the lampshade fabric from the frame. Sometimes the fabric is glued on, so if it won't come off easily, just snip away as much fabric as possible and be as neat as you can!
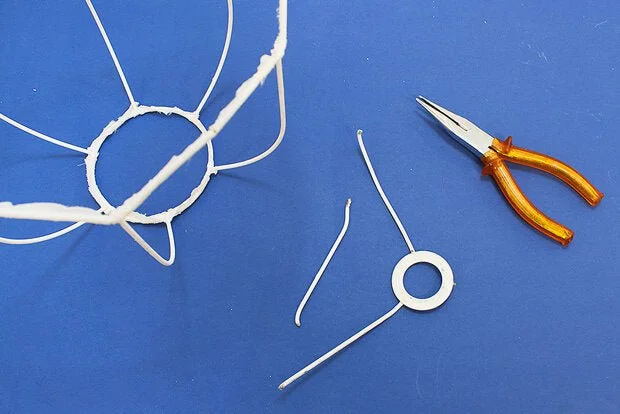
Step 2
The lampshade will eventually be turned upside down to become the planter basket, so you'll need to remove the light bulb holder in the middle. Use the wire clippers to cut the middle section out. This might take a bit of work, as the wire can be thick. Be careful not to cut yourself!

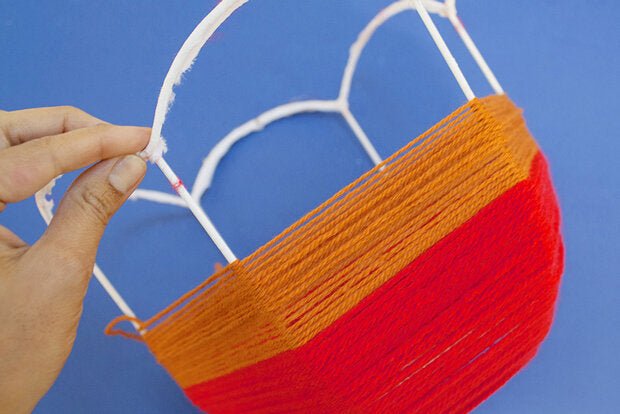
Step 3
Choose a yarn colour for your base and cut about one metre of yarn to start off with. Starting at what was once the top of the lampshade, tie the yarn to one of the side frame wires. To begin weaving, wrap the yarn once around the wire to the right of the one you tied to, then continue wrapping once around each of the wires, moving in an anti-clockwise direction until you get back to the beginning. Keep weaving in this way around and around and you'll gradually see your weaving build up along the wires.

Step 4
When you want to switch yarn colours or add more of the same colour, simply tie the new colour onto the previous one with a double knot and keep weaving.
Step 5
It's up to you how thick you want each strip of woven colour to be. We made our bottom sections a bit thicker to form a nice colourful base.

Step 6
If your lampshade has a scalloped edge, weave all the way up to the scallops and tie off your yarn. If it doesn't have a scalloped edge, you can choose to weave all the way up until the wire circle at the top.
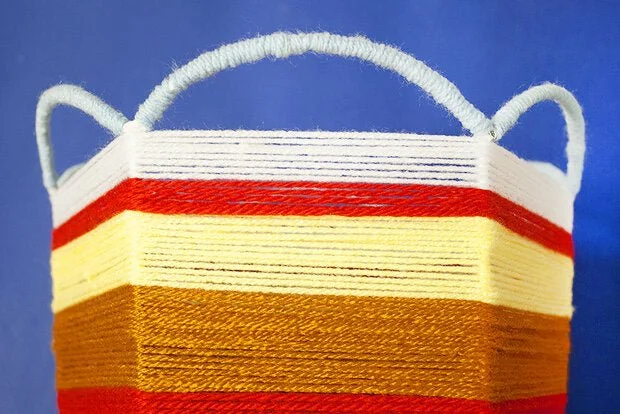
Step 7
Tie a contrasting coloured yarn onto the scalloped part of the frame and begin wrapping all the way around each scallop until you have covered all the wire. Tie off the yarn.

Step 8
Use a pompom maker to create a few assorted pompoms in colours of your choice. We bought our pompom maker from our local craft store, but if you can't find one you can just make it the old fashioned way with two circles of cardboard. Tie the pompoms onto the top of the basket as a finishing touch.


Hot Tip: You don't have to use your baskets for plants, they could also function as hold-alls for any of your knickknacks. Try gluing a circle of cardboard or wire into the base so nothing falls out.
This DIY project was originally published as part of a monthly content series for frankie Magazine.