

DIY Block Print Wall Hanging
Before I was a craft-based designer I actually studied printmaking at art school. I loved the many processes of creating prints -lithography, screenprinting, etching, block printing… the possibilities were endless. Once I’d graduated and no longer had access to my university printmaking studio it became a little harder to keep creating, so I looked for alternative ways to make prints without the fancy equipment.

And so we come to this DIY project! Here’s an accessible way to create your own prints using supplies that you can easily find in your local stationery, office supplies, or craft store. Consider this your entry into the wonderful world of printmaking - something easy to create and also perfect as a project to do with kids. I encourage you to experiment with different shapes and motifs for your blocks - the only limit is your imagination!

You Will Need
- 1 large piece of pink card or construction paper
- 2 thin strips pink card/construction paper, approximately 8cm long and 3cm wide
- A4 craft foam sheets (or cardboard box pieces if you don’t want to use foam)
- 3 scrap pieces of wood or thick card in varying sizes
- Acrylic paint in the following colours: green, black, orange, white
- Round dowel rod, the same size as the short edge of your card
- Square dowel rod, approximately 40cm long
- Foam paint roller
- Tupperware container lid or artist palette
- Scissors
-
Hot glue gun or tacky, quick dry craft glue

Step 1
To create blocks for printing, cut one planter pot and two different-sized tropical leaves from the craft foam or cardboard box pieces (we used a monstera leaf shape). We made our shapes large enough to comfortably fill the pink card when stamped. Use the hot glue gun or craft glue to stick each foam shape onto a separate piece of wood.

Step 2
Squeeze some paint onto the palette or Tupperware lid. Roll some orange paint evenly onto the sponge roller, then transfer to the pot plant stamp, ensuring that you get an even coverage of paint over the foam.

Step 3
Carefully print your pot plant shape onto the bottom part of your pink card, using the palm of your hand in firm circular motions against the back of the stamp board to transfer the paint onto the paper. Don't worry if some of the paint doesn't transfer the first time, you can always re-coat the stamp and print over the top again. Allow this to dry.
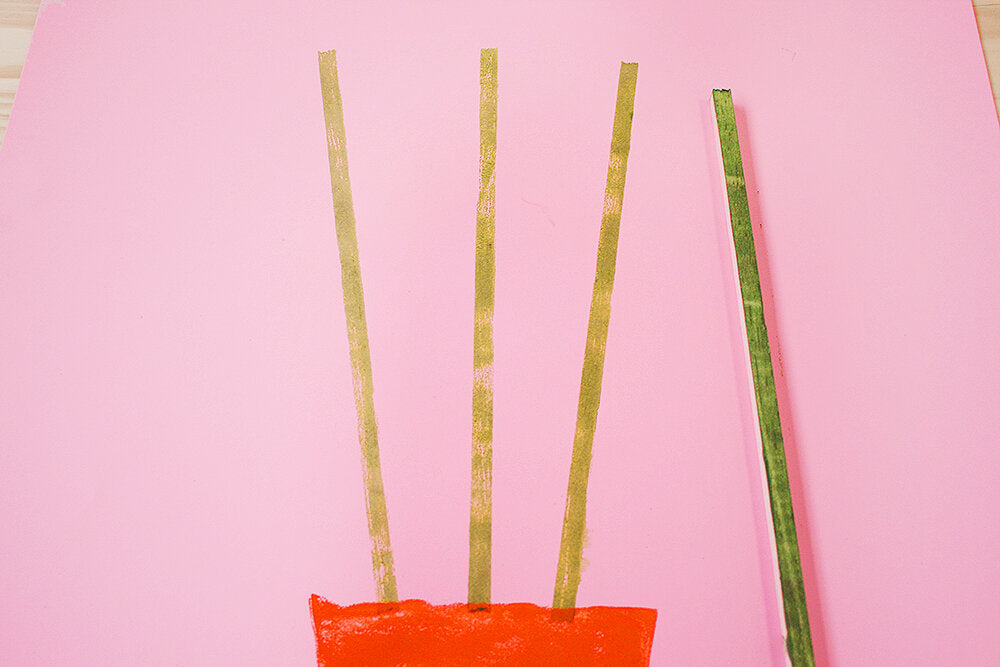
Step 4
Coat one side of the square dowel rod with green paint and use it to stamp three stems onto the pink card. Allow this to dry.

Step 5
Use the white and black paints to mix into the green to form two different shades of green for your leaves. Coat one of the leaf stamps in paint and use the same stamping technique from step 3 to print two leaves onto the pink card, in any position you like. Allow this to dry, then coat the remaining leaf in a different shade of green and print two more leaves.

Step 6
Use the hot glue gun to stick the short edges of each pink card strip together to form loops. Glue each loop onto the back of your print, approximately 10cm in from each end, along the top edge.

Step 7
Insert the round dowel rod into the paper loops to form a hanger for your print. Hang your masterpiece somewhere special, and enjoy!