
DIY Forever Foliage Felt Monstera
My obsession with indoor plants knows no bounds. Not only do they purify the air, they're good for your mental health and they look damn good, I mean, what's not to love?! This DIY craft project is for all you plant geeks out there, but also for those of you who want to be a green thumb, but just can't catch a break. Here's an indoor plant you can't kill!

My passion for handmade, craft-based props has spanned the better part of the last decade - I’ve even made a career out of it! I’m constantly inspired by creating faux versions of things, made from unique and unconventional materials. The idea of a plant made from felt is so fun to me! I started them a few years ago for friends who kept killing their real plants, but who still wanted greenery in their home. As I experimented with forever foliage varieties I became more and more obsessed and delighted with the process. Now I’m sharing some of my prop design tips and techniques with you in this monstera DIY project so that you can experience some of the delight tooYou Will Need
Plain card stock
Stiff green felt in a variety of tones
Crepe paper to match the felt
Small florist's block
Large cup or container (for the pot)
Pipe cleaners
Pencil
Pliers
Scissors
Glue gun
Wire
Double-sided sticky tape
Step 1
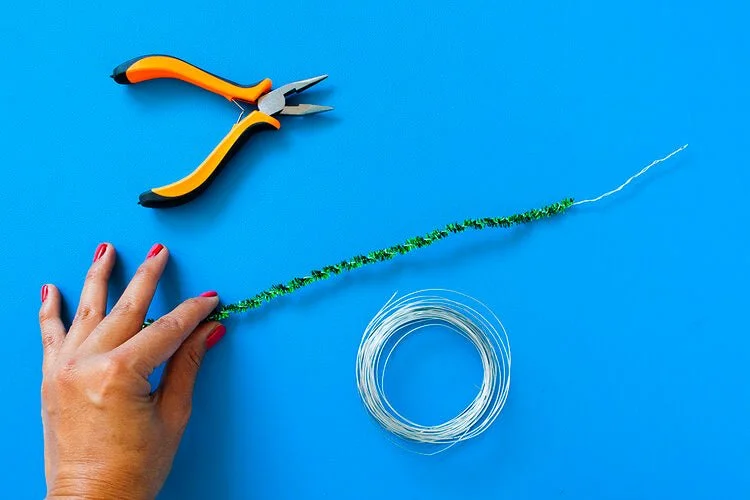
For each monstera leaf (the amount of leaves is up to you) you'll need a pipe cleaner stem. Wrap wire tightly around each pipe cleaner to give it more structure, leaving a twisted section of wire at one end.

Step 2
Cut a long, thin strip of crepe paper 1.5cm wide and approximately double the length of each pipe cleaner. Apply double-sided sticky tape along one side of each strip, then wrap it all the way up the pipe cleaner, covering the pipe cleaner completely, but not the extra wire section.

Step 3
To create templates, draw some different-sized monstera leaves onto the card stock and cut them out. Trace around the leaf templates onto the green felt and cut them out. Use the hot glue gun to affix the excess wire part of the stems onto the leaves, concealed under a strip of felt in the same colour as each leaf.

Step 4
Create a variety of different leaf combos by twisting stems together in bunches, then concealing with another layer of crepe paper. You could try rolling up a leaf (for that new leaf vibe) and securing it with blobs of hot glue. You could also create some aerial roots by wrapping shorter lengths of pipe cleaner in brown crepe paper.

Step 5
Decorate your container (planter pot) in any way that you like. I decided to keep it simple and wrap mine in the leftover card stock. You also could use paint, markers, felt, or even a real planter pot).

Step 6
If your florist's block doesn't fit into your container, use a cutting knife to shave it down so it fits snugly inside. Put a blob of hot glue on the base so it sticks securely to the bottom of the pot.

Step 7
Use the pencil to create little tunnels in the top of the florist's block. This will help your stems push in easier. Stick your leaves into the block in the formation of your choice. If the weight of the leaves are making your plant flop over, make sure the stems are pushed all the way into the florist's block. If you made aerial roots, twist them around the stems here and there. You could even embed their ends back into the block to help support the stems.

Step 8
Display your un-killable creation in pride of place and enjoy - just make sure you don't water it when you're giving your real plants a bath!