
DIY Painted Wall Planner
I love a bit of organisation in the studio! As a naturally disorganised person I’ve learned to lean on planners, lists and calendars to keep me on track with work and life commitments. I’ve got journals for exploring ideas, an online organiser to manage tasks, Google calendar to send me notifications so I don’t forget appointments, and too many paper to-do lists to count!
There’s something magical in creating an organisational system that truly works for you, so if you’re anything like me you’ll love this bright and visual planner project, made using offcuts of acrylic sheets and some spare paint.

I used acrylic offcuts and paint to create this simple wall planner.
As much as I love my digital organisational tools, I’m a very visual person, and I sometimes need a big, bright and phsyical way to plan my tasks. Up until this point I’d been using a whiteboard to create a quarterly planner so that I could get an overview of what I had on my plate over the next 3 months. This kind of planner really helps me when it comes to keeping tasks manageable, not overbooking myself, and staying ahead in my organisation by knowing what’s coming up. However, being an aesthetics gal I was finding that my plain ol’ whiteboard was not cutting it in the looks department, and since I love to surround myself with beautiful stuff to inspire my creativity, I decided to level up and create something new and fabulous.

Making notes
The idea behind this painted quarterly wall planner is simple. Because I like to upcycle and buy secondhand where I can, I found some cheap acrylic sheet offcuts on Facebook Marketplace (5 for $20!). If you can’t find any similar offucts on your local Marketplace I’d try looking up some signwriting or laser cutting businesses and seeing if they have any. Or, at a stretch you could purchase new acrylic sheets online or find them at your local hardware store.
I used some spare paint from my studio stash. For colour lovers, the paint is from Resene (my favs) and the colours I used were Biloba Flower, Neva and XOXO.
By painting on the back of the acrylic sheet, you can achieve a colourful decorative look while still being able to write on the front. Using whiteboard markers allows you to reuse each panel again and again in whatever way you like! Also, if you aren’t in a position to screw this wall planner directly into your wall, you could hang a cord or chain from the top and use a removable hook instead.
If you need a weekly wall planner, why not source one acrylic sheet for each day of the week? Perhaps it’s just a daily planner you’re after, in which case 1 larger acrylic sheet will do. You can personalise the painted shapes on the back too - maybe you'll paint the entire panel in one block colour, create patterns or colour-blocking, or vary the shapes you choose. I love how customisable this DIY is! Now let’s get stuck in to the nitty gritty of how I made this wall planner. Read on, friend
You will need

Clear acrylic sheets
Acrylic paint
Large piece of paper (to make a template)
Paintbrush
Small screws
Drill
Scrap piece of wood (for drilling)
Pencil
Scissors
Tape
How to make a painted wall planner

Step 1
Create a template for your painted shape using the large sheet of paper. If you want to replicate the wavy shape I used, I’d suggest tracing around a roll of tape or cup to form the wavy lines.
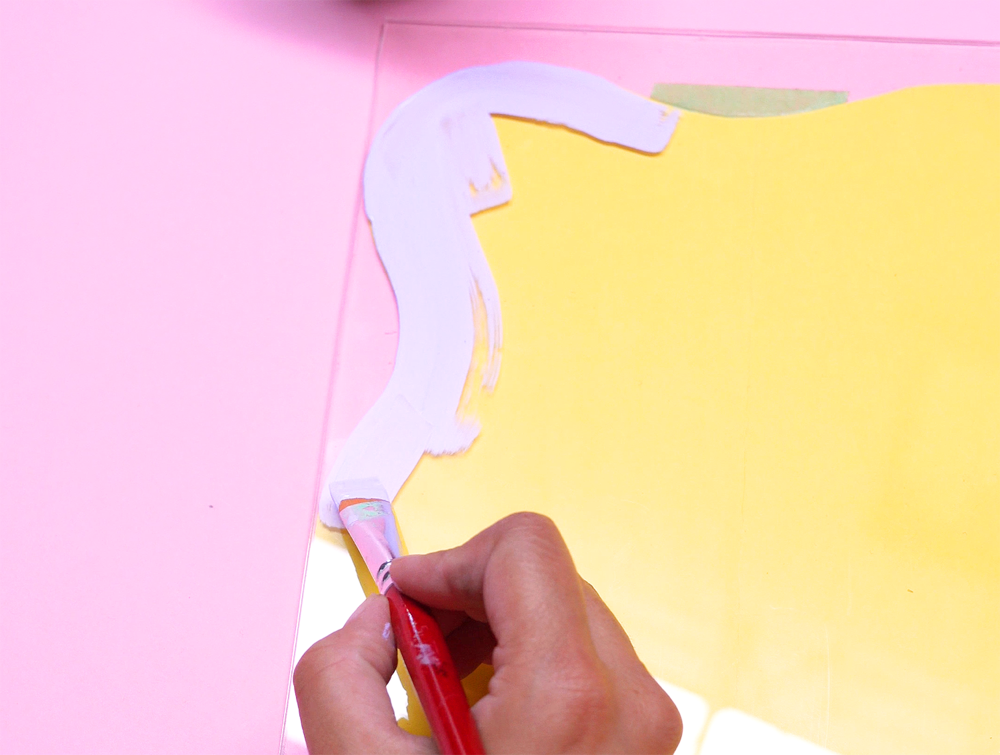
Step 2
Cut out the template, then tape it to the underside of your clear acrylic sheet. You can now begin painting on the other side of the acrylic, using the template underneath as a guide.

Step 3
Apply 2-3 coats of paint to the acrylic sheet, until it’s completely opaque when viewed from the other side. Repeat these steps to create more panels if you wish.

Step 4
When the paint is fully dry, drill 4 pilot holes into each corner of the acrylic sheet. I like to put a sheet of scrap wood underneath to catch the drill (so I don’t drill into my table!)
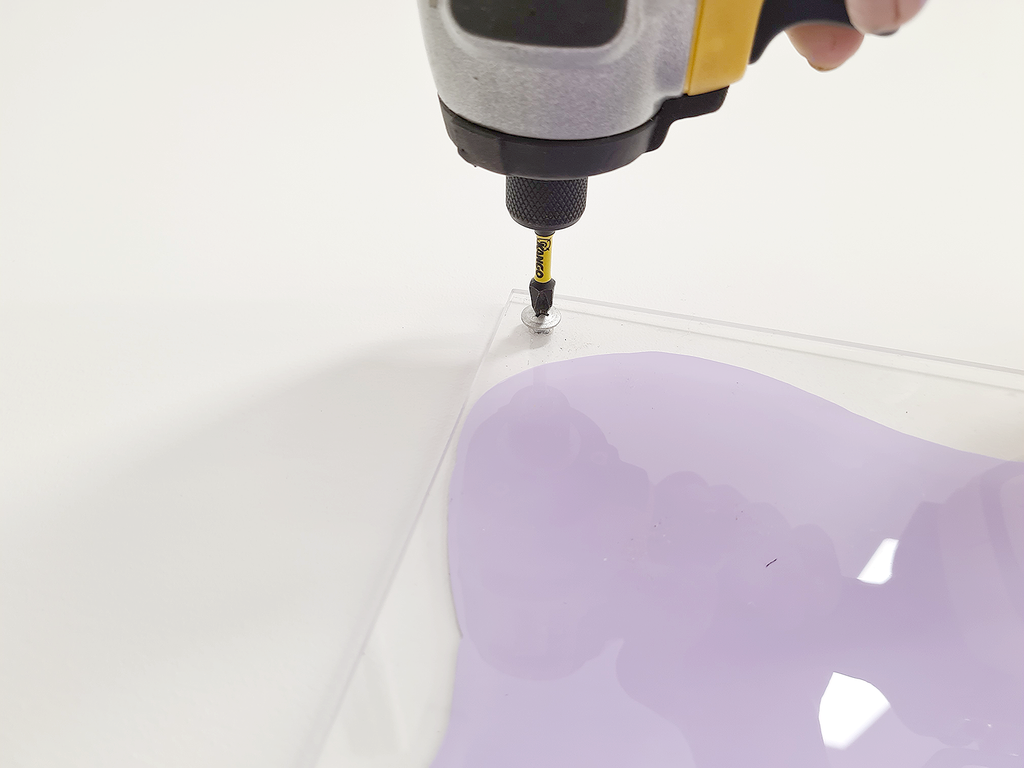
Step 5
On your wall, mark out where you want each panel to go, and drill pilot holes. Then, screw in each panel to the wall. I left a 3mm gap between each panel and the wall to create a cool shadow and protect the paint from scratching off against the wall.

I love how my new painted wall planner looks in my studio! If you are keen to try this project I’d love to see what you create. Tag me on social media by using the hashtag #kitiyapalaskasdiy. Happy organising!