
DIY Painted Shoe Makeover
Okay, so I’m just gonna say it - I’m officially obsessed with shoe painting! During the first COVID lockdown in 2020 here in Australia I purchased some leather paints on a whim, fully intending to get crafty with them immediately. But as things go, life got in the way, and I’ve only just got around to experimenting with them now. Better late than never though! From the minute I put paintbrush to shoe, I knew I’d found my new favourite craft and I think you’ll feel the same once you give it a try.
If you've got a pair of old leather shoes lying around (perhaps destined for the charity bin), why not give them a colourful makeover with some leather paint? Available at most art and craft stores or online, you’ll have no trouble sourcing these colourful little pots of paint and the additional supplies you’ll need for this project. I used the Angelus brand of paint products as they are made specially for leather (although you can paint on other surfaces with the right prep), but I’ve seen a few different brands on the market. Angelus paints come in a rainbow of vivid colours and have such a beautiful finish so if you can source them, I would highly recommend them! You could also try Neopaque Artist Acrylics. They’re great and work on natural and synthetic fabrics, leather, canvas, wood, paper, vinyl, suede, plastic, clay, rubber and more.
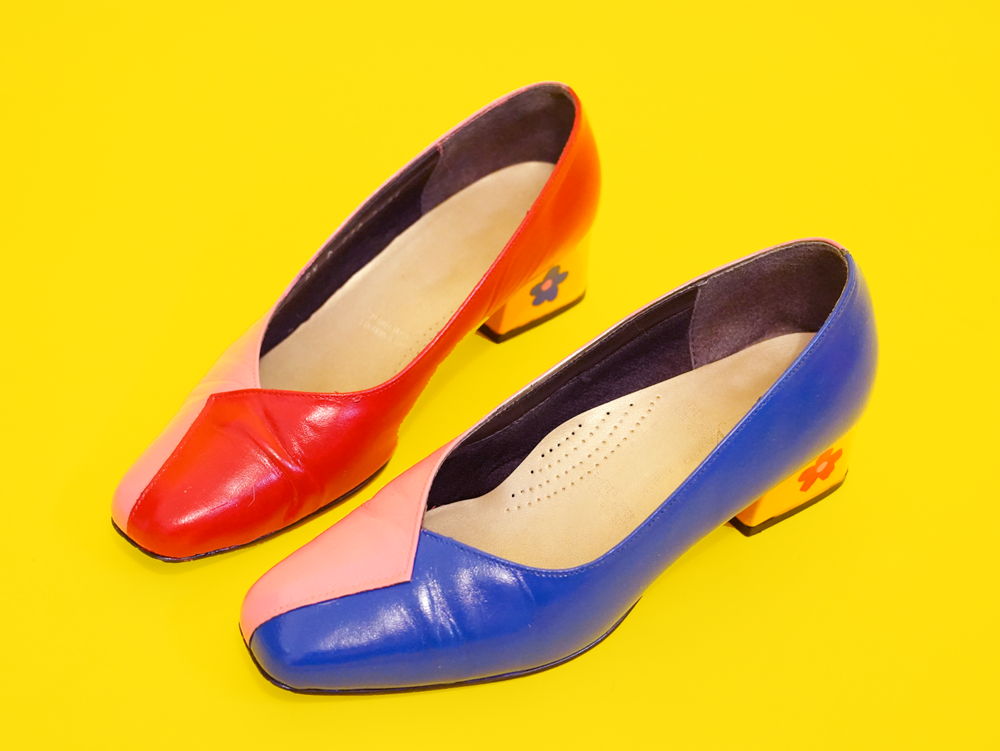
Get creative with colour blocking and decorative painted motifs. The only limit is your imagination! This project works for any leather shoe - including sneakers, and is so easy and fun. After some simple prep and a few coats of paint, your old shoes will look like new, but better!
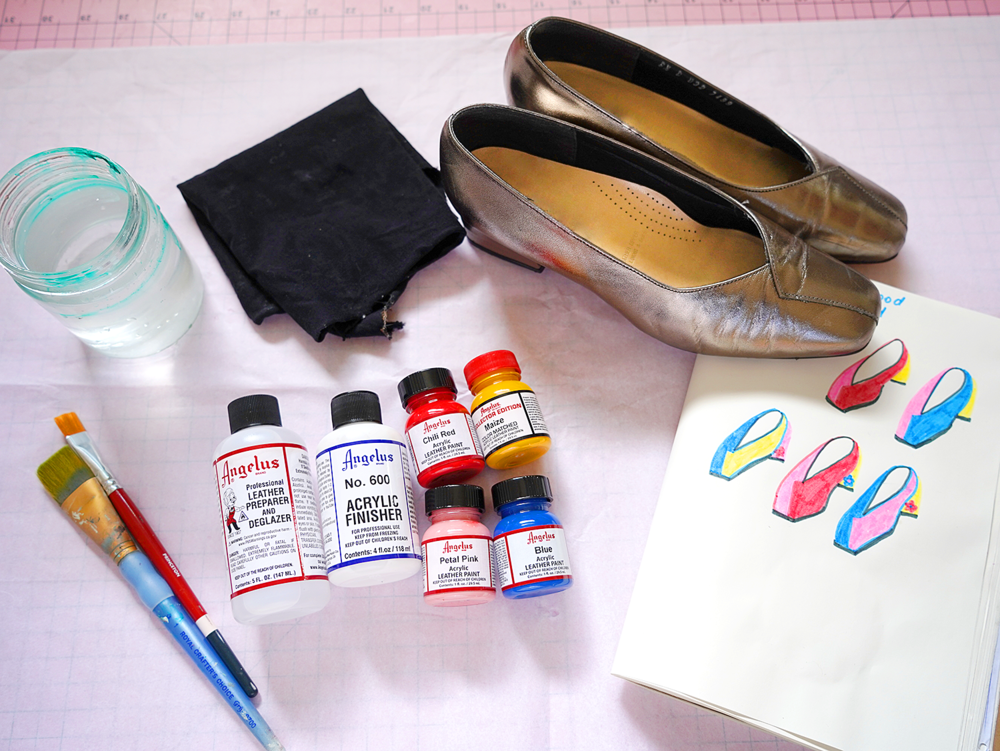
You Will Need
An old pair of leather shoes
Leather paints in assorted colours
Leather deglazer
Acrylic Finisher medium for leather
Paintbrushes
Water to rinse your brushes
A rag

Step 1
Start by cleaning and preparing your shoes using the leather deglazer and a rag. If you have sensitive skin or are sensitive to smells, I would recommend using gloves and a mask. I also used a bit of deglazer to clean the inner soles as well.

Step 2
Once your shoes are completely deglazed, it’s time to choose your design and start painting. Build up the colour one layer at a time, allowing the paint to fully dry between each layer. Some colours are less pigmented than others, so you may need to apply more layers of these.

Step 3
Experiment with colour blocking and graphic motifs! Use a smaller paintbrush for more detailed elements, and a larger flat brush for big blocks of colour.

Step 4
When you’re done and the paint is completely dry, apply a coat of Acrylic Finisher to seal and protect the paint. Your fancy new shoes are now ready to wear!


