An Introduction To Eco-dyeing
Once you discover this simple, earth-friendly dyeing technique, we guarantee you’ll never look at nature the same way again. Using nothing but foliage and a few helpful tools you can create vivid and colourful patterns and designs on silk, and the best thing is, there’s no harmful chemicals! I created this project with my amazing mum, Natima Palaskas
You Will Need
A piece of white or cream silk (try searching your local op shop for a vintage silk blouse)
A variety of leaves (we used eucalyptus and rose leaves for this piece, but you can use almost anything – explore your garden and see what you can find. Some may dye and some might not, experimentation is the key!)
Strong, thick twine or string
Copper or metal pipe, or a tin can
A variety of rusty objects (copper pennies, paperclips, bottle tops, nails, washers, etc
Double steamer (or you could use a saucepan and colander with a lid)
Access to a hot plate or portable stove
Vinegar
Bucket
Step 1
Wet the silk in a bucket containing three parts water and one part vinegar. Wring out the excess liquid then lay the silk out on a tabletop.
Step 2
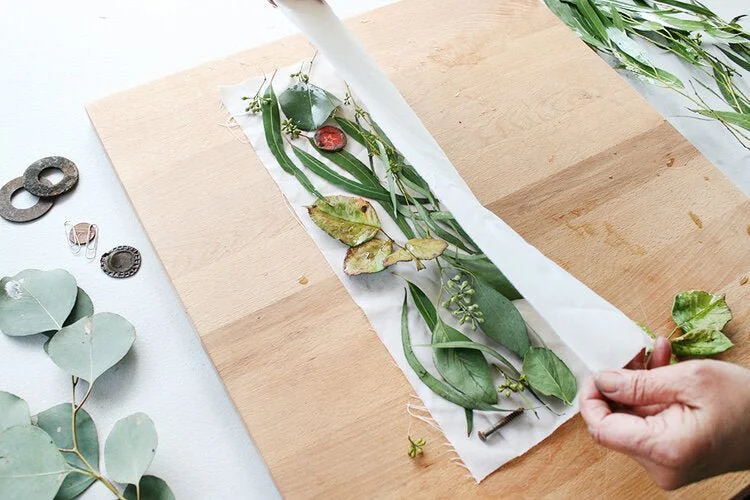
Lay your chosen leaves out onto the fabric, along one half only. Use as many leaves as you want, and have fun experimenting with different placements and designs. Add some rusty bits and bobs to your design to produce interesting effects on the fabric, but also to act as a mordant (a substance used to set dyes on fabrics).
Step 3
Once you’re satisfied with your design, fold the other half of the fabric over the leaves. Gently press down and smooth the top of your fabric.
Step 4
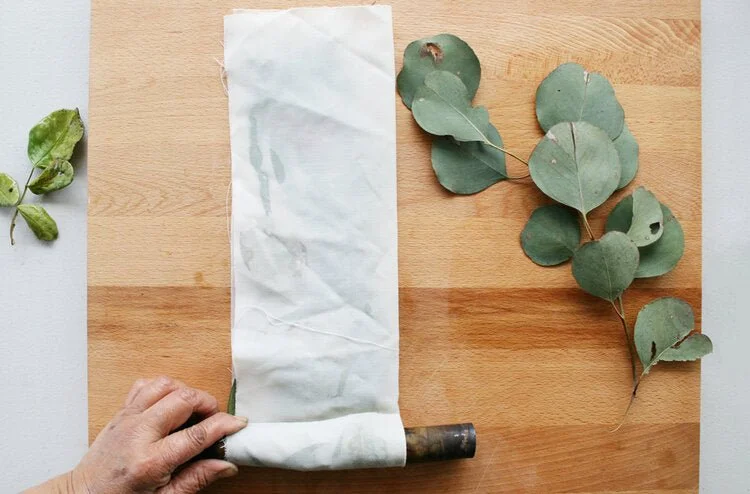
Place the piece of pipe at the bottom end of your folded fabric and begin rolling the fabric tightly around the pipe, tucking in any stray leaves and smoothing creases in the fabric as you go.
Step 5
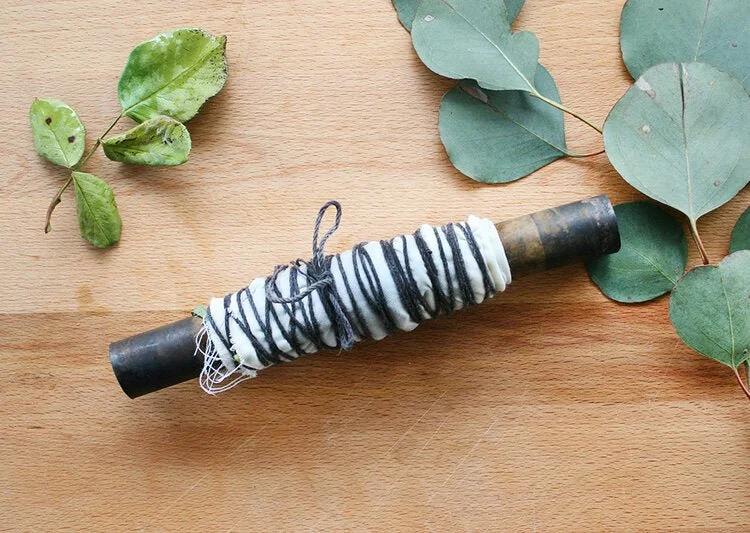
Hold a long piece of twine in the middle of the rolled fabric and begin wrapping tightly towards the end of the pipe. Turn the bundle over and wrap the twine all the way to the other end. Tightly knot and secure the twine and snip the excess, so it’s bundled up like a salami.
Step 6
Fill the bottom part of the double-layer steamer with water and place the wrapped bundle in the top section. With the lid on, place the steamer on your hot plate or stove and turn the temperature to high. Steam the bundle for up to two hours (this is the recommended time for eucalyptus leaves). You can make a bunch of different bundles and steam them all at once if you want! Eco-dyeing is very much about chance and experimentation, so try varying the steaming time and see what results you get.
Step 7
After your bundle has steamed for two hours, remove it from the double steamer and allow it to cool. Unwrap the bundle and unfold the fabric, removing the leaves and rusty objects to reveal the magical result!
Step 8
Study the marks made by different leaves and note down what worked and what didn’t, so you can build up a little directory to refer to next time you dye. Allow the fabric to dry completely, then press with a hot iron to seal the print. If you ever want to wash your fabric, you can hand wash it with a gentle detergent.
There are many ways to make use of your beautiful eco-dyed fabrics, but here are some of our favourite ideas:
make a scarf
use for furoshiki wrapping cloths
as a fabric in quilting projects
apply applique
turn it into its own hanging art piece
create fabric journal covers
use for gift wrapping


